DIY Aventum II Wood Stand RollersPost Date: 2014-05-30 |
Post Reply 
|
| Author | |
Blackstar 
Newbie 

Joined: 10 May 2014 Online Status: Offline Posts: 14 |
 Quote Reply Quote Reply
 Topic: DIY Aventum II Wood Stand Rollers Topic: DIY Aventum II Wood Stand RollersPosted: 30 May 2014 at 10:05pm |
|
I searched for a good, strong PC stand on the Internet to hold and move around this Aventum II case and the weight of it and I couldn't find what I like. Yes some are different metal, or plastic stands out there, big and small but none of them would fit this really big size case plus it's long in length. Weight alone would probably crush the plastic stand's frame. This Aventum II is not your average computer case! And you need a 2nd person to help you carry it to another room. It's pretty heavy.
So I was thinking why not I just build it myself to MY exact specification and I want wheels on them so I can easily transport it by myself outside when I need to blow dust out of the system every now and then. Here is the Aventum II Wood Stand Rollers. 
I have included the layout diagram (located at bottom of this post) in case for those who's interested building one for their Aventum II case. For all these materials, it costed me $36.85 from one stop at Home Depot hardware store. Not bad. Here's the instruction: The list you you need for the Aventum II Wood Rollers 3FT - 2x12” solid board from Home Depot (Had to buy the whole plank 8 FT), check for warping- $12.84 4x - 1 ½” Rubber wheels caster swivel (get next size up bigger wheel for transporting your system on carpet) - $2.97 16x - 1” Round Head Phillips wood screws - $2.36 4x - ¾’ Flat Head Phillips wood screws (screw's head cannot be bigger than 3/8") - $1.18 1 Flat Black spray can - $3.87 Optional 150 & 250 grit sandpapers 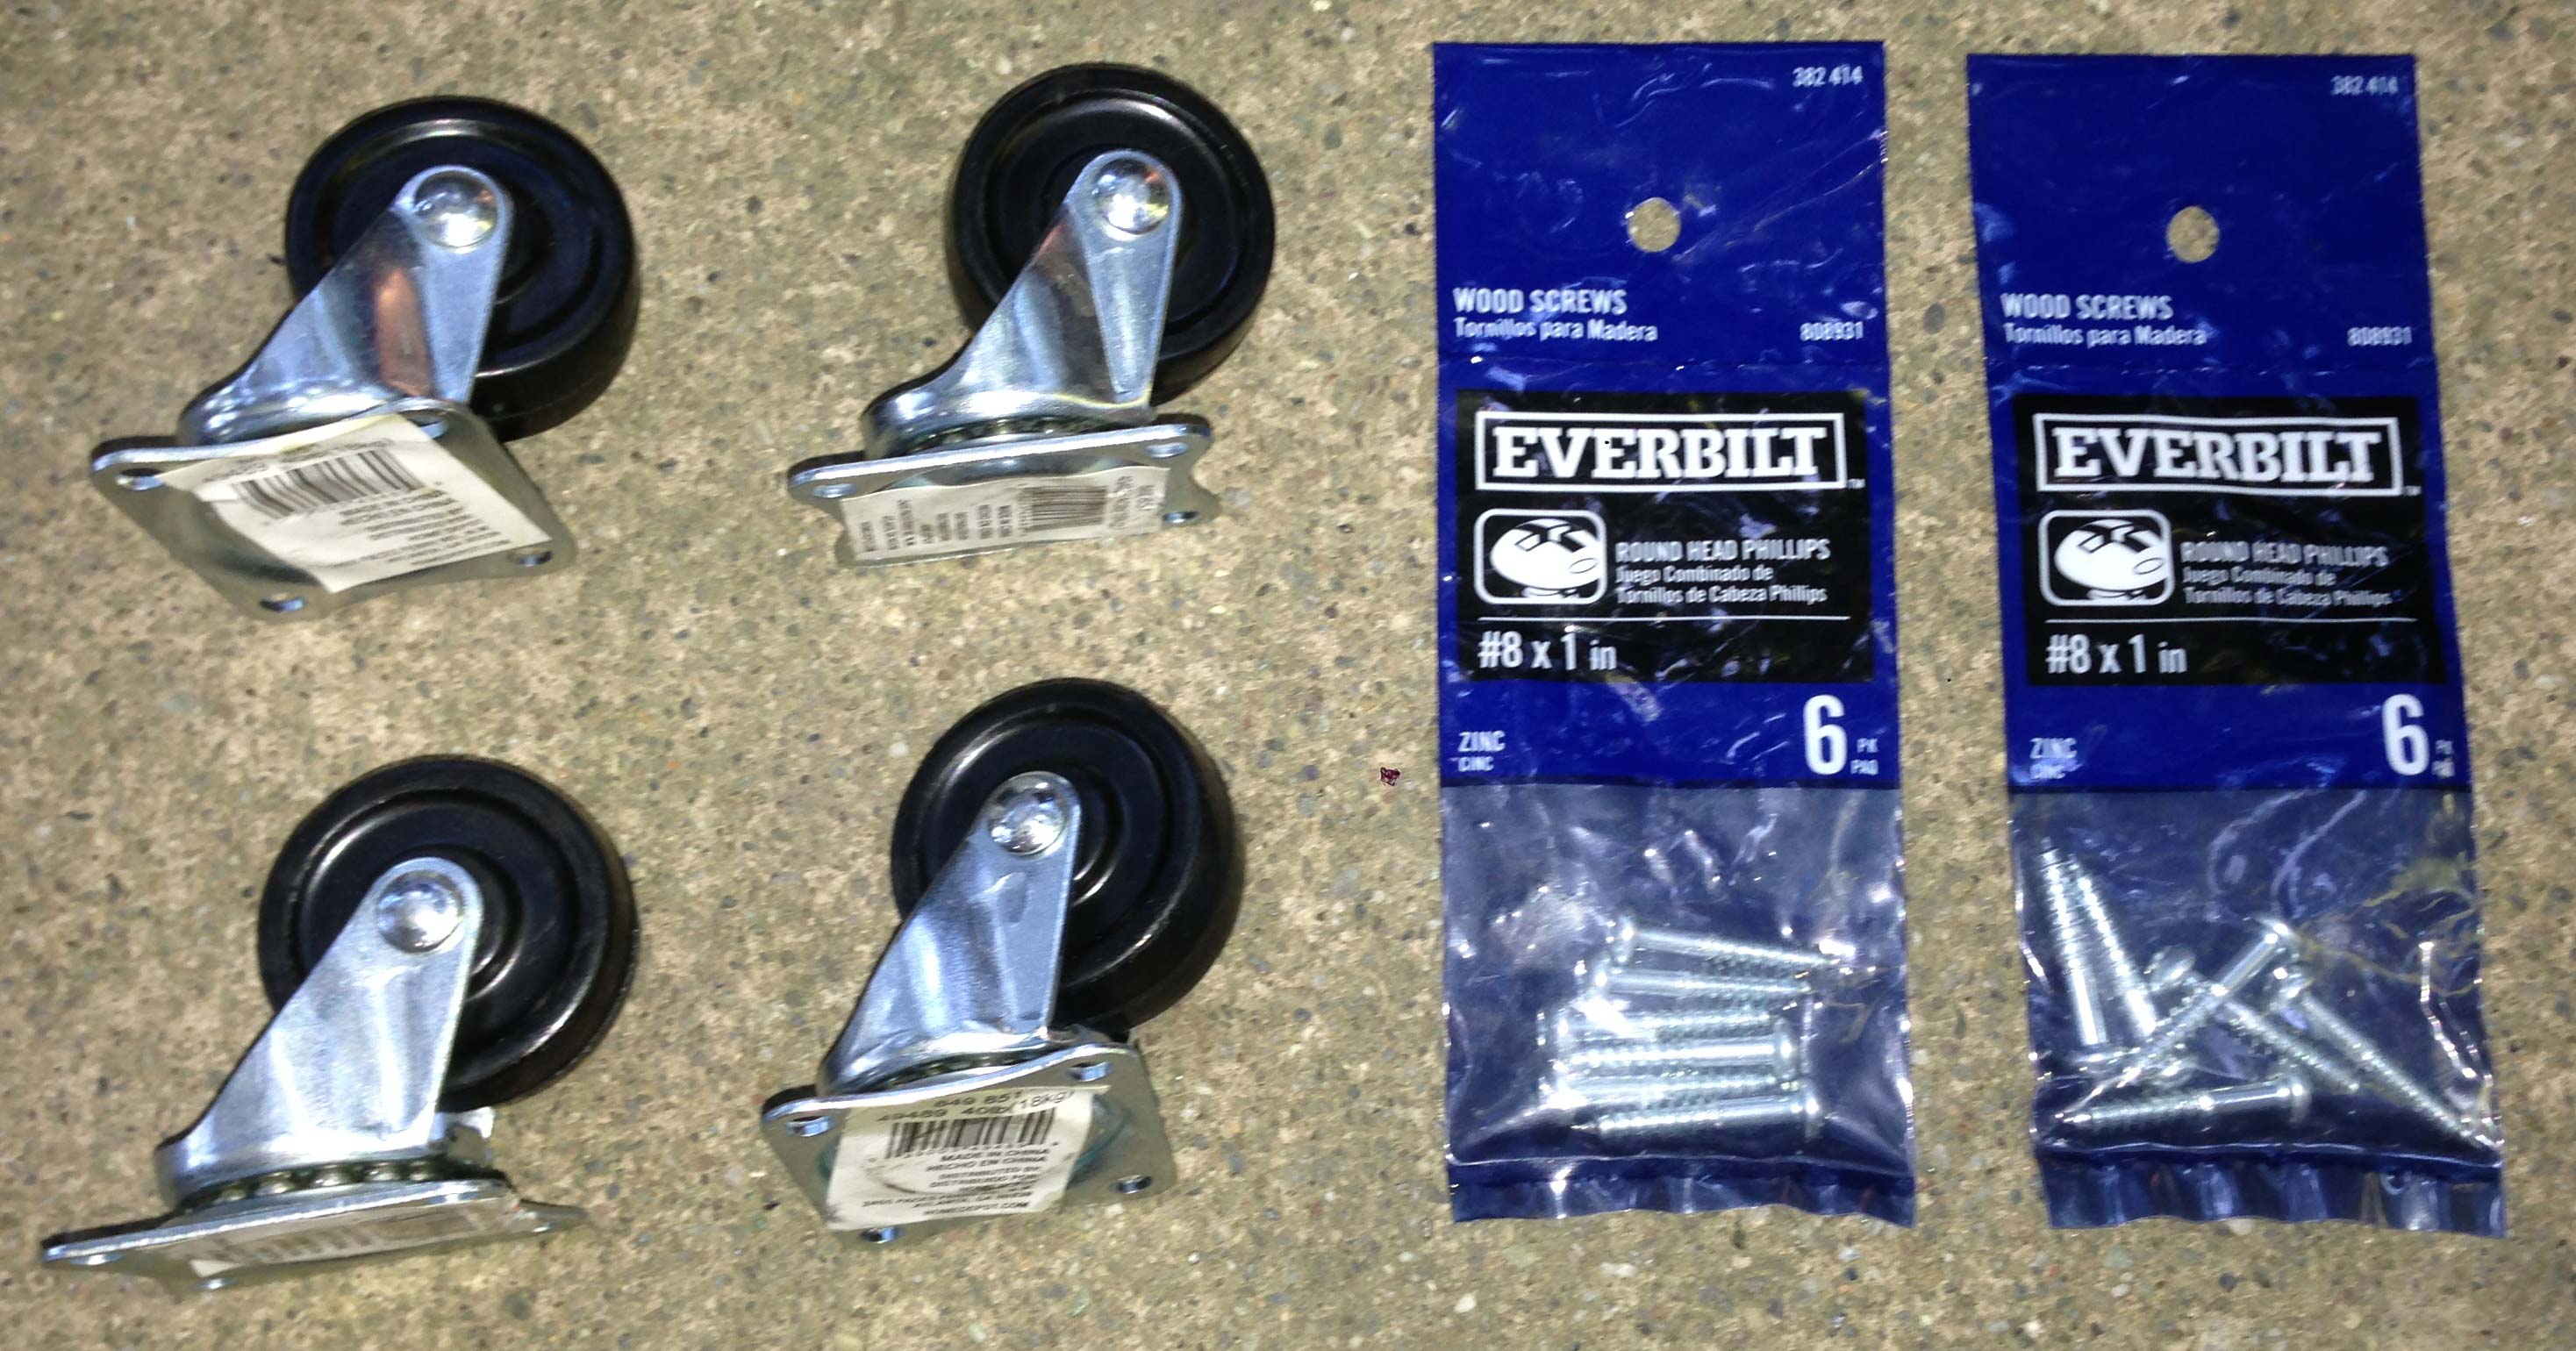
Ok, let's get to work...Cut the 2x12” board by: 29 ¾” length 9 ½” width 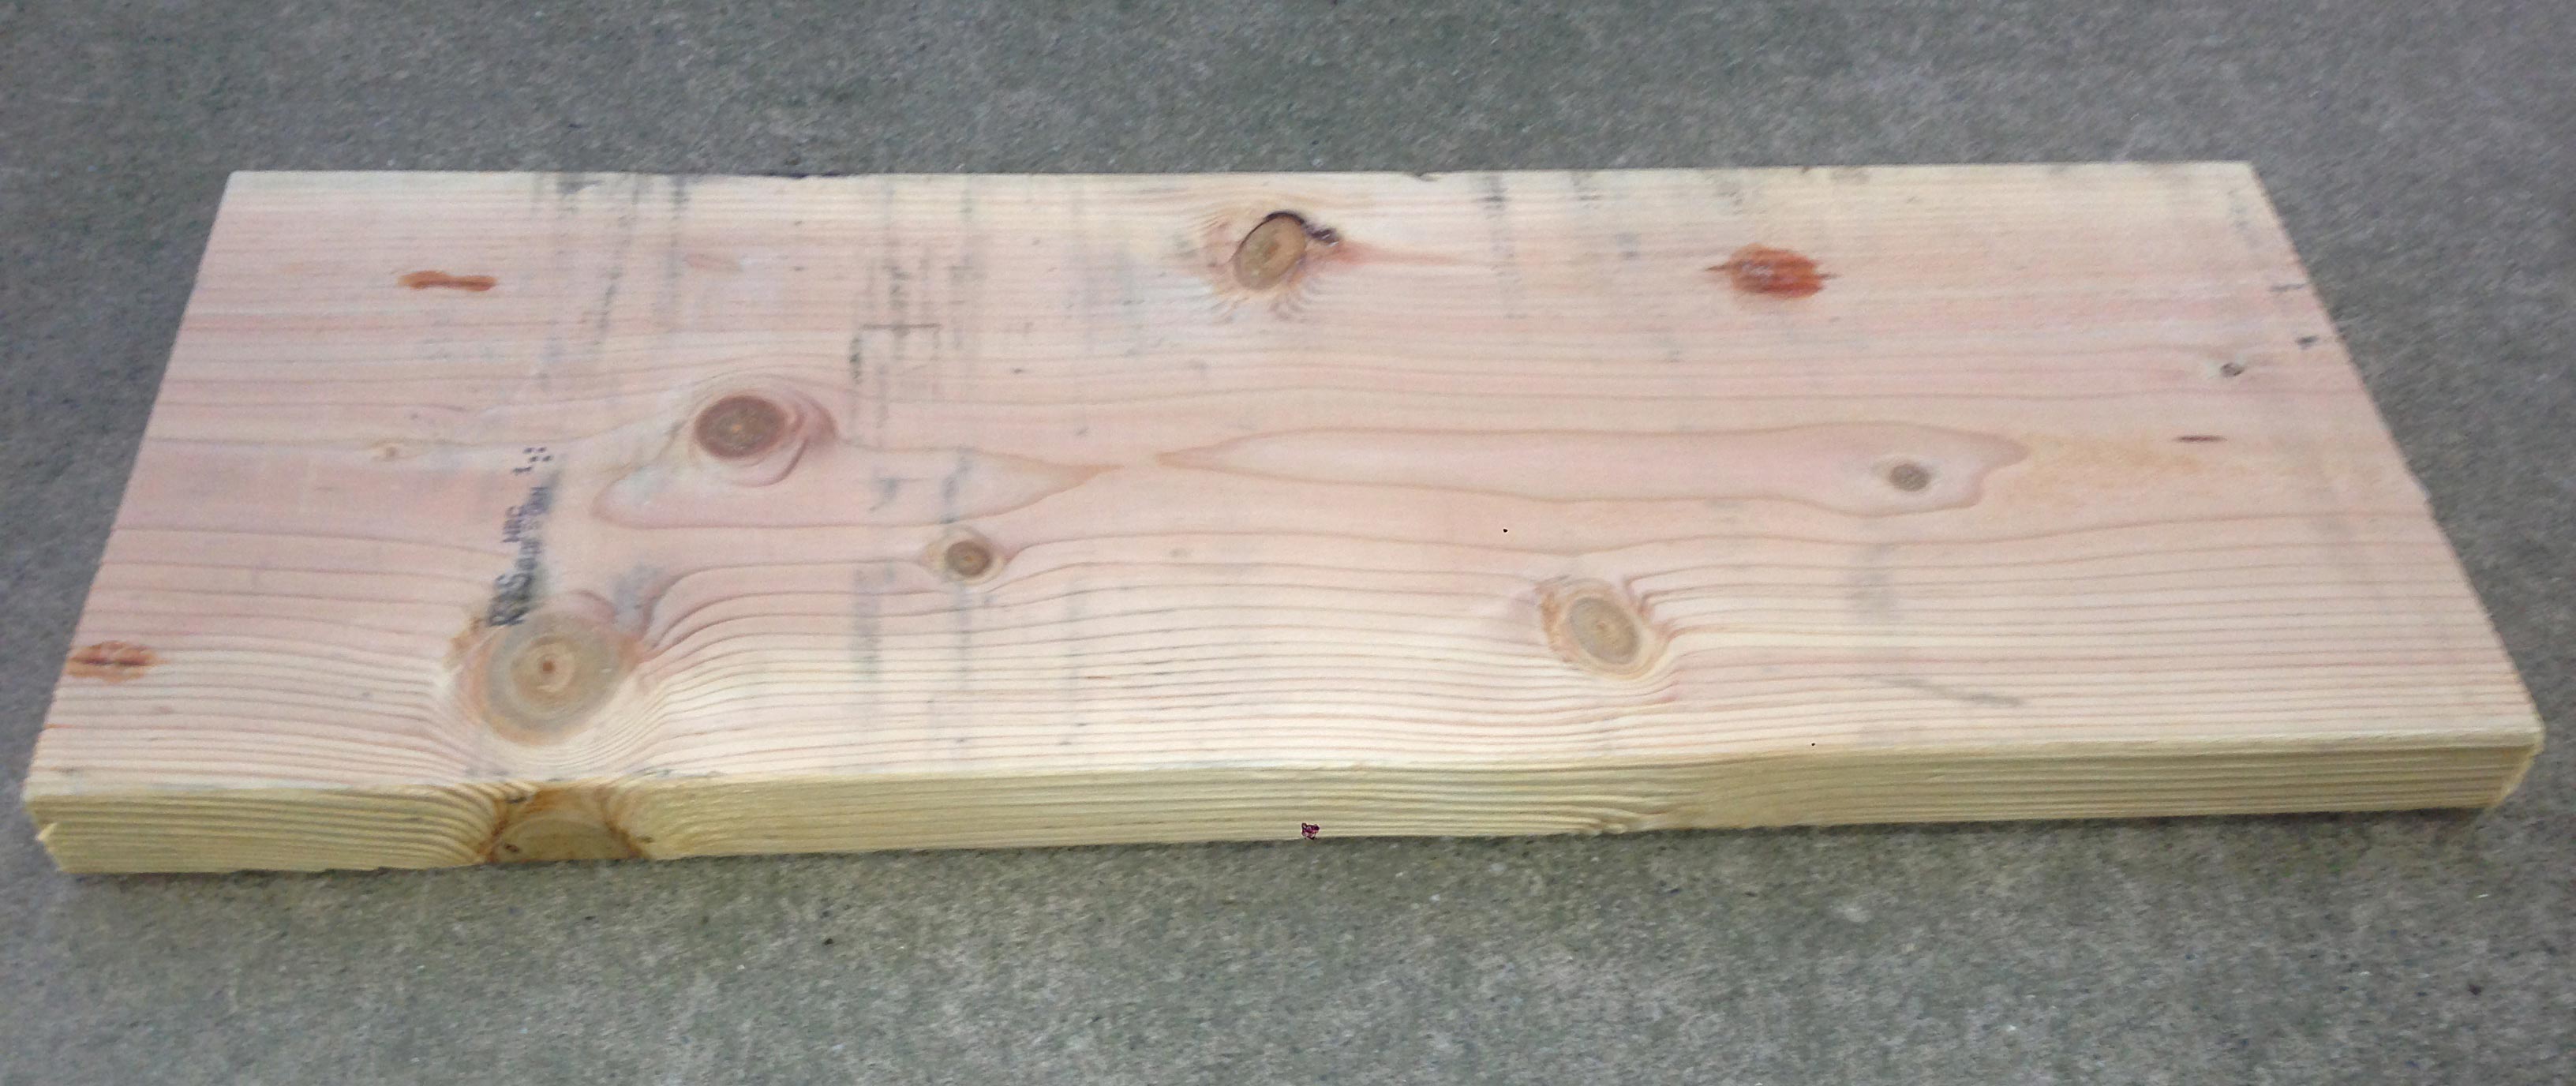
Create marks for pilot holes for top-sided on the board for the 4x Flat Head Screws (Top-sided that meets the bottom of Aventum II case): Aventum II “legs” (red painted bottom legs) has 6 metal screws attached to the case and we only need 4 (one at each corner). The front of the legs (and rear) of two metal screws is exactly 7 ¾” width apart, hole to hole. So we need 7 ¾” width on the board, centered between the board’s edges and exactly 2 ¾” from the front of the board. You should have approx. of 15/16” to 1" of space between the hole to the edge on both side of the board then mark it and drill pilot holes. Repeat the same measurement on the rear end and also make sure the front end's holes are 24” length to the rear end's holes & drill pilot holes for the rear part of the board. You should now have total of 4 pilot holes on this one flat side of the board. 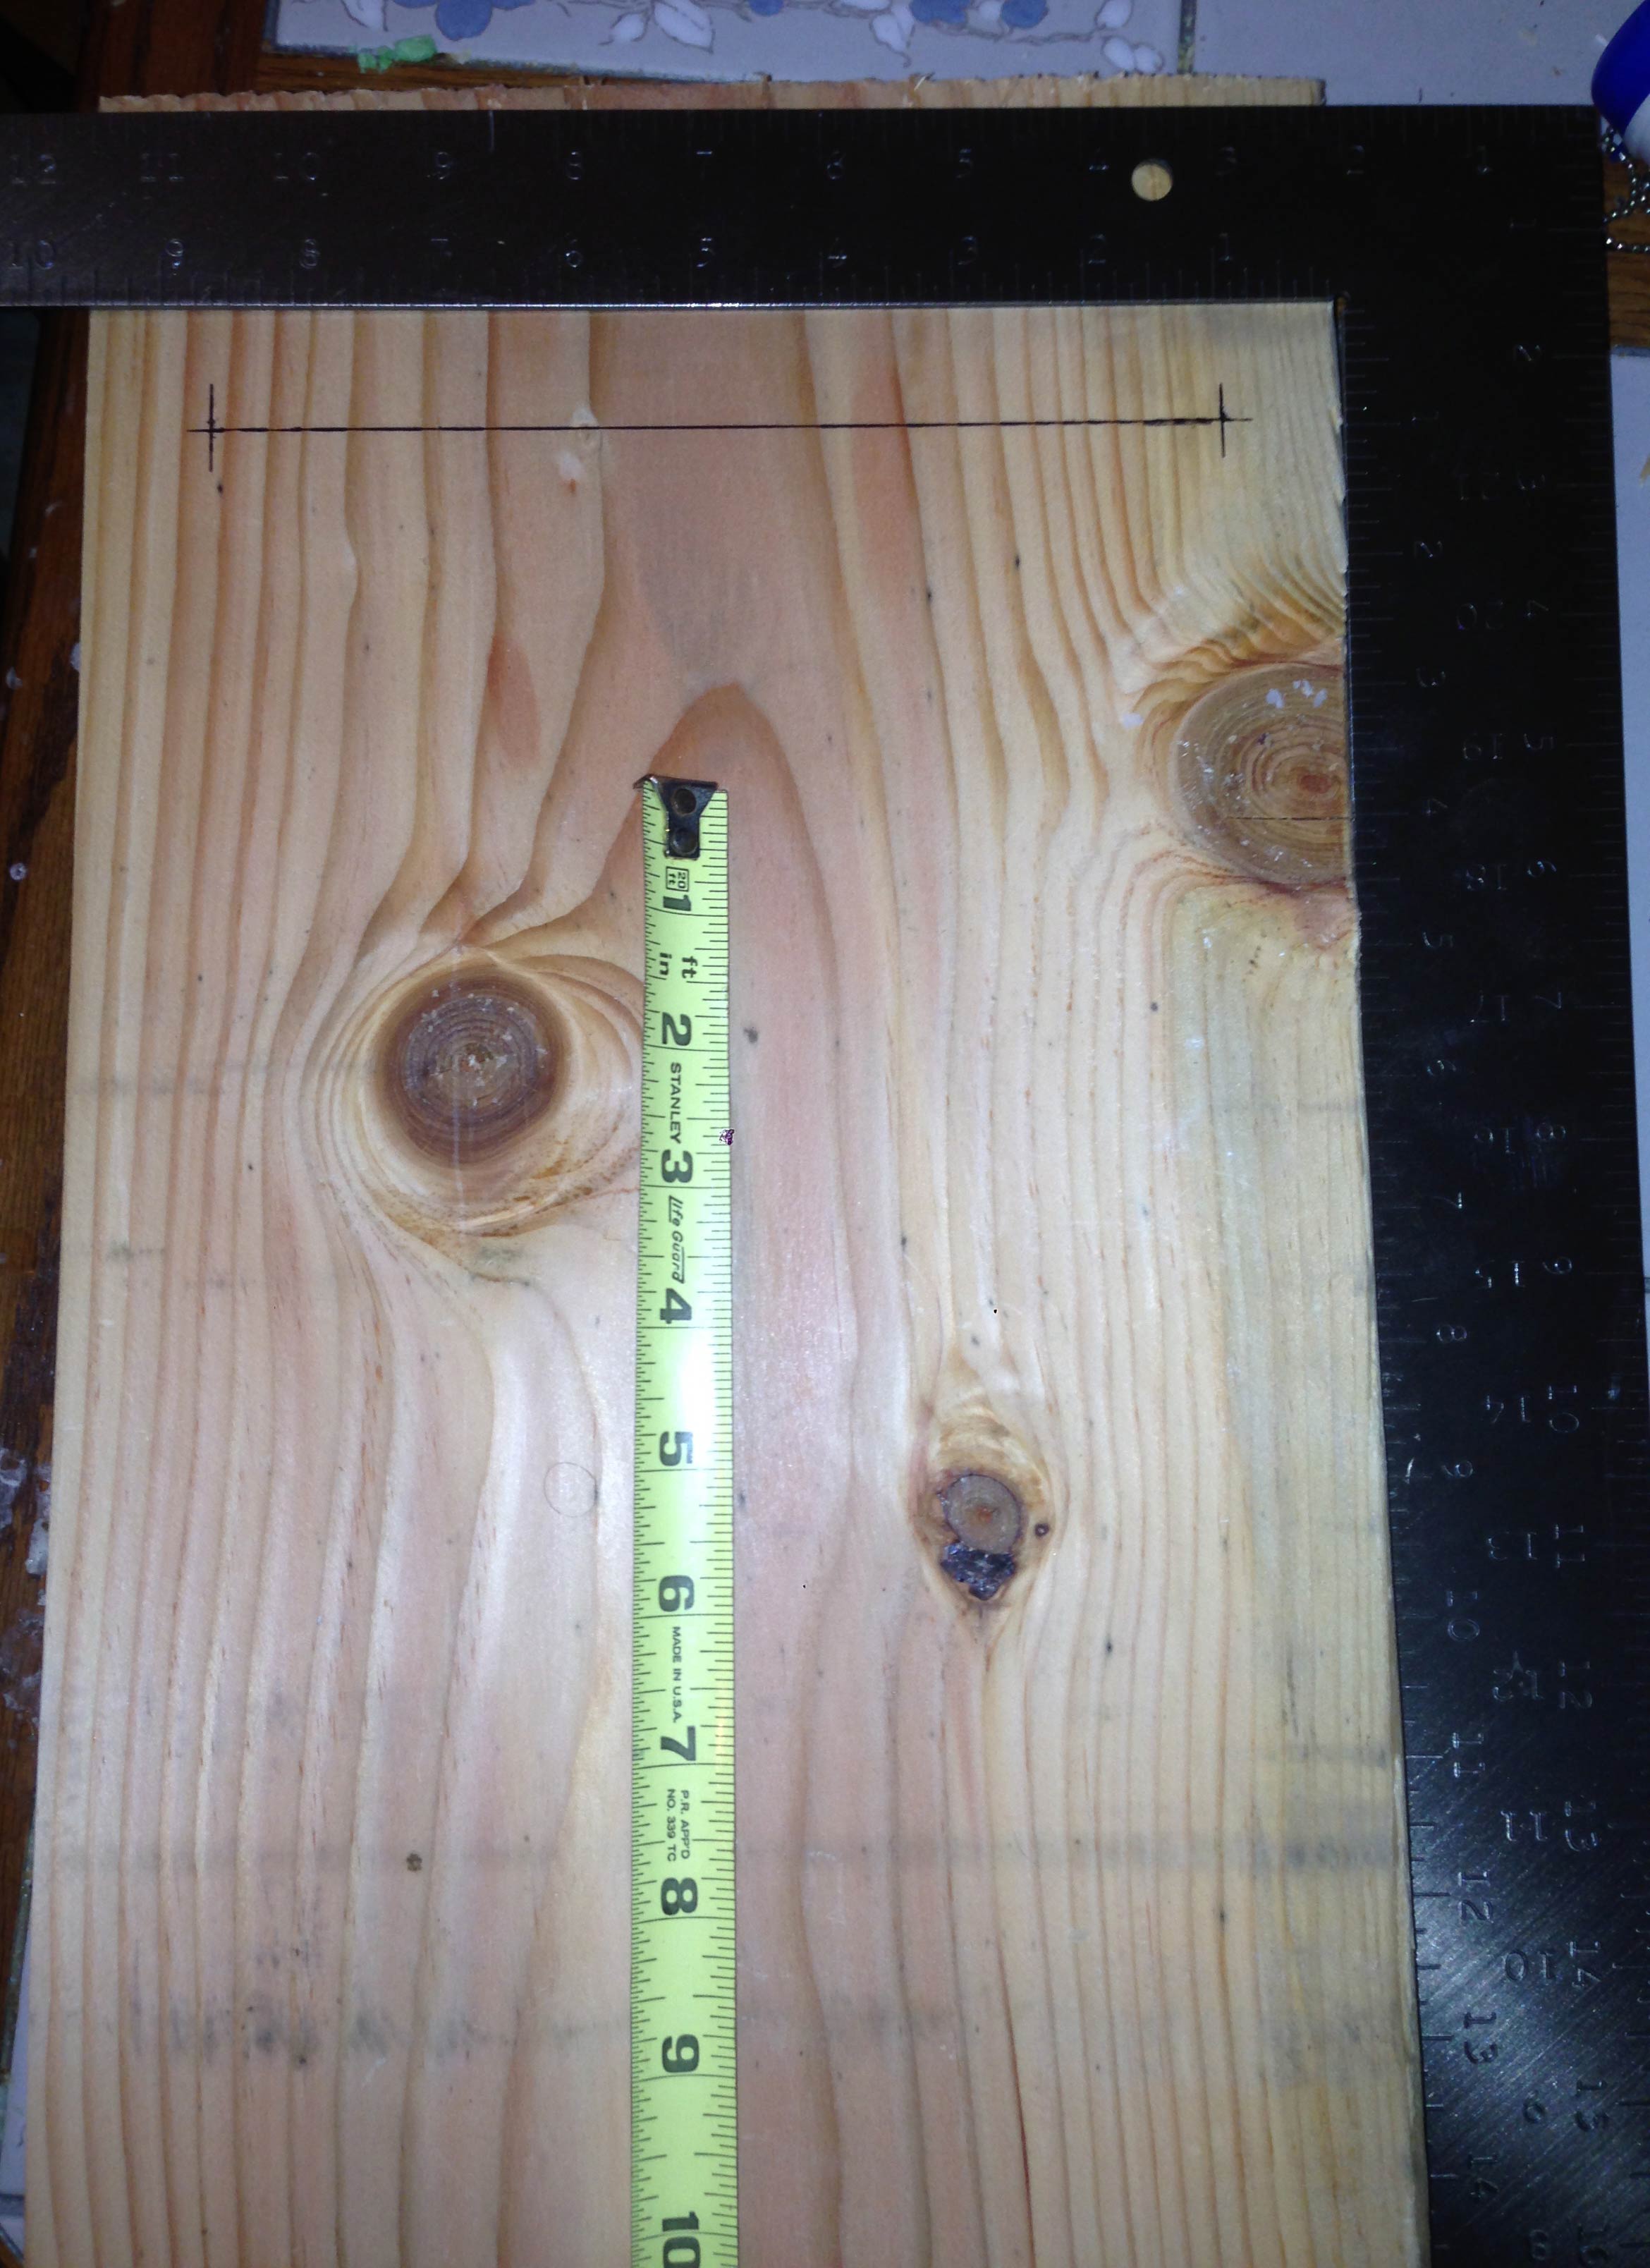
See this photo below, this is one of the Aventum's "leg" that has two holes: bigger outer hole almost looked as oval shaped to make space for Phillips driver to pass through to the second inner hole where the screw goes in...and see how both holes is lined up to the wood? It is critical to have exact 7 ¾" width holes and exact 24" length from front to rear end, hole to hole. I will explain in next step why. 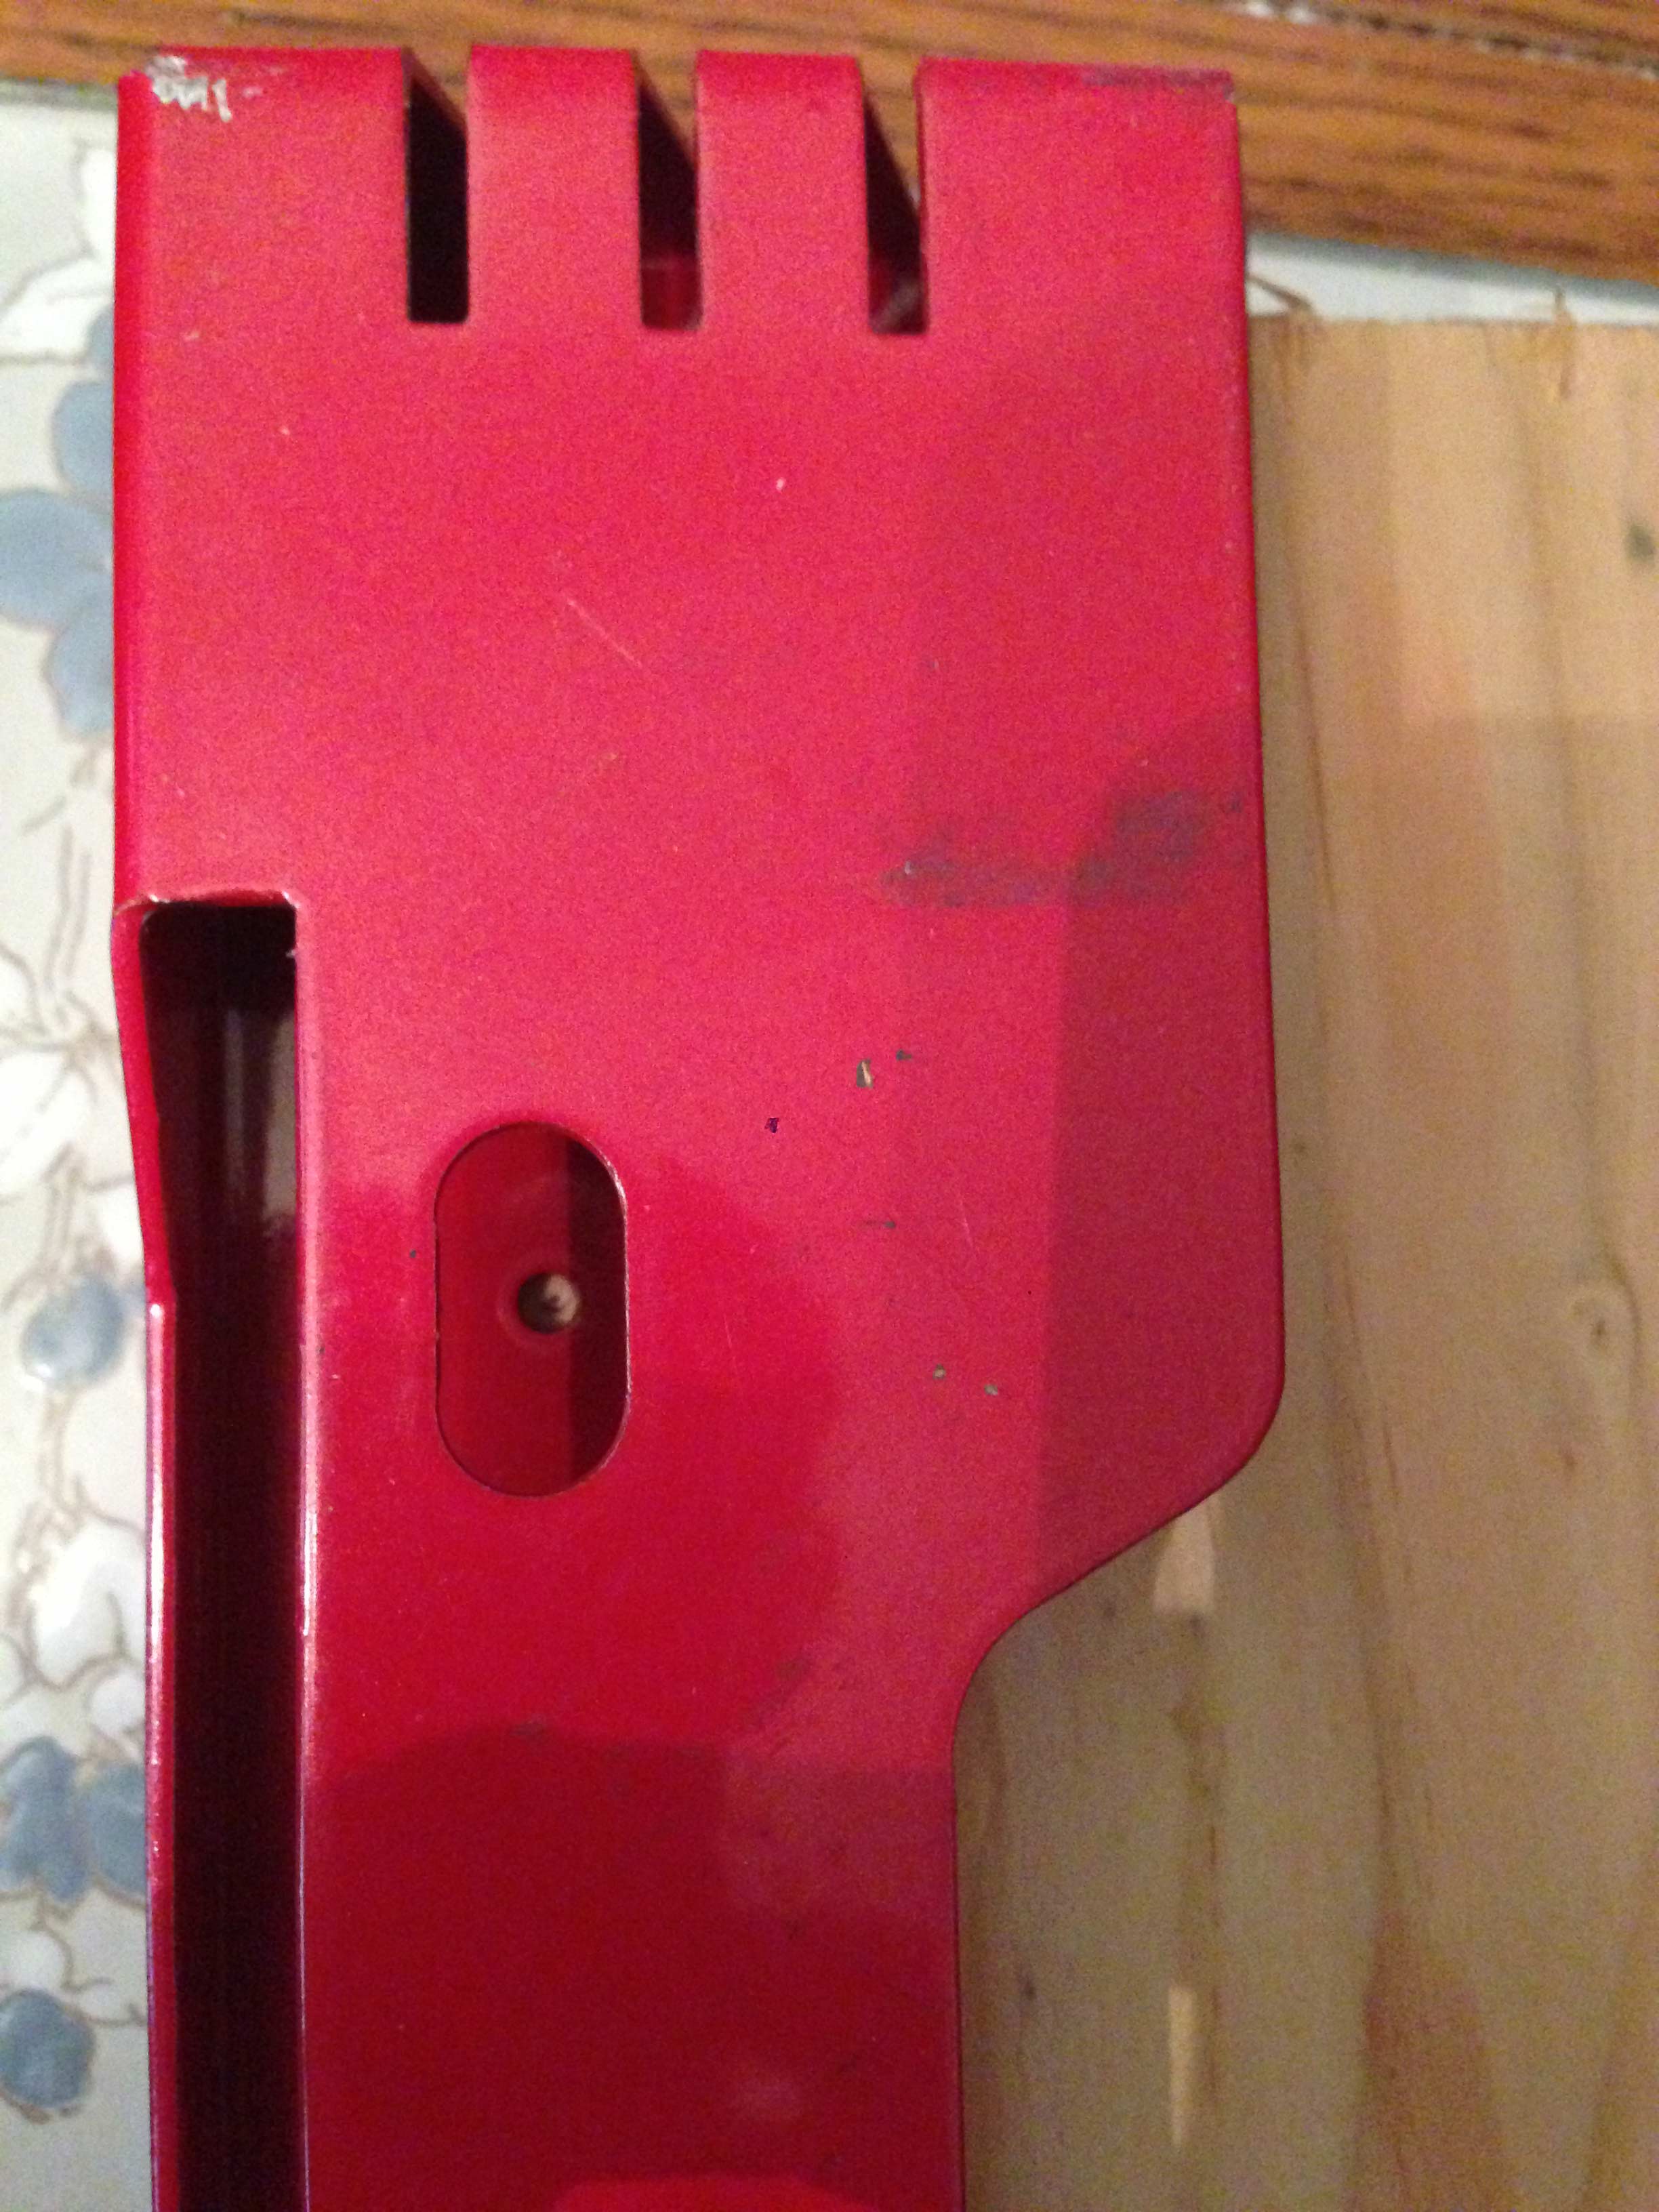
This is the Flat Head Phillips screw and noticed it's not screwed all the way into the wood? We want to stick it out, say about 1/4" from surface of the wood to top of the screw's head where its head "hold" the Aventum's leg in its track to keep the Aventum II case from sliding off the wooden board if you hit a bump on the floor, such as hardwood floor meets the living's room carpet. 
This is how it should look like the screw's head to hold the legs in place to keep the case from moving it around on the board. This is why its critical to have the exact measurement of those 4 holes,7 ¾” apart and 24" in length so all four screw's heads perfectly lined up with Aventum's leg outer hole. Fail to do this, you will not able to attach the board & "lock" it down between the case to the board. Also it is critical when buying this Flat Head screws that the head part must not be at 3/8" or over in width to pass through the Aventum's leg outer oval shaped hole. 
Next, (sorry forgot to take a picture for this step but it's easy to do it) is to create marks for pilot holes for bottom-sided on the board with 16x Round Head Phillips wood screws for the 4 rollers caster attached to the bottom-sided board. At each corner of the board, draw a line the width and the length of the board at ½” from the edges and attach the roller onto the board, lined up with the lines and mark the roller’s 4 holes (where the 4 screws goes in) then drill the 4 pilot holes. Repeat the same measurement for each corner & drill the pilot holes. Remove all the screws you may have in the board and put it aside and sand the board smooth with 150 grit sandpaper then the 250 grit sandpaper with a electric sander (or sanding block) and then clean the sawdust off. At the end of the bottom-sided board (doesn't matter which end), we are going to screw 1 Round Head Phillips wood screw in one of the pilot hole on each corner…this two screws will serve as an anchors to hoist the board up on string or wire (make sure it isn't touching the board) for easy spray painting on all sides of the board. 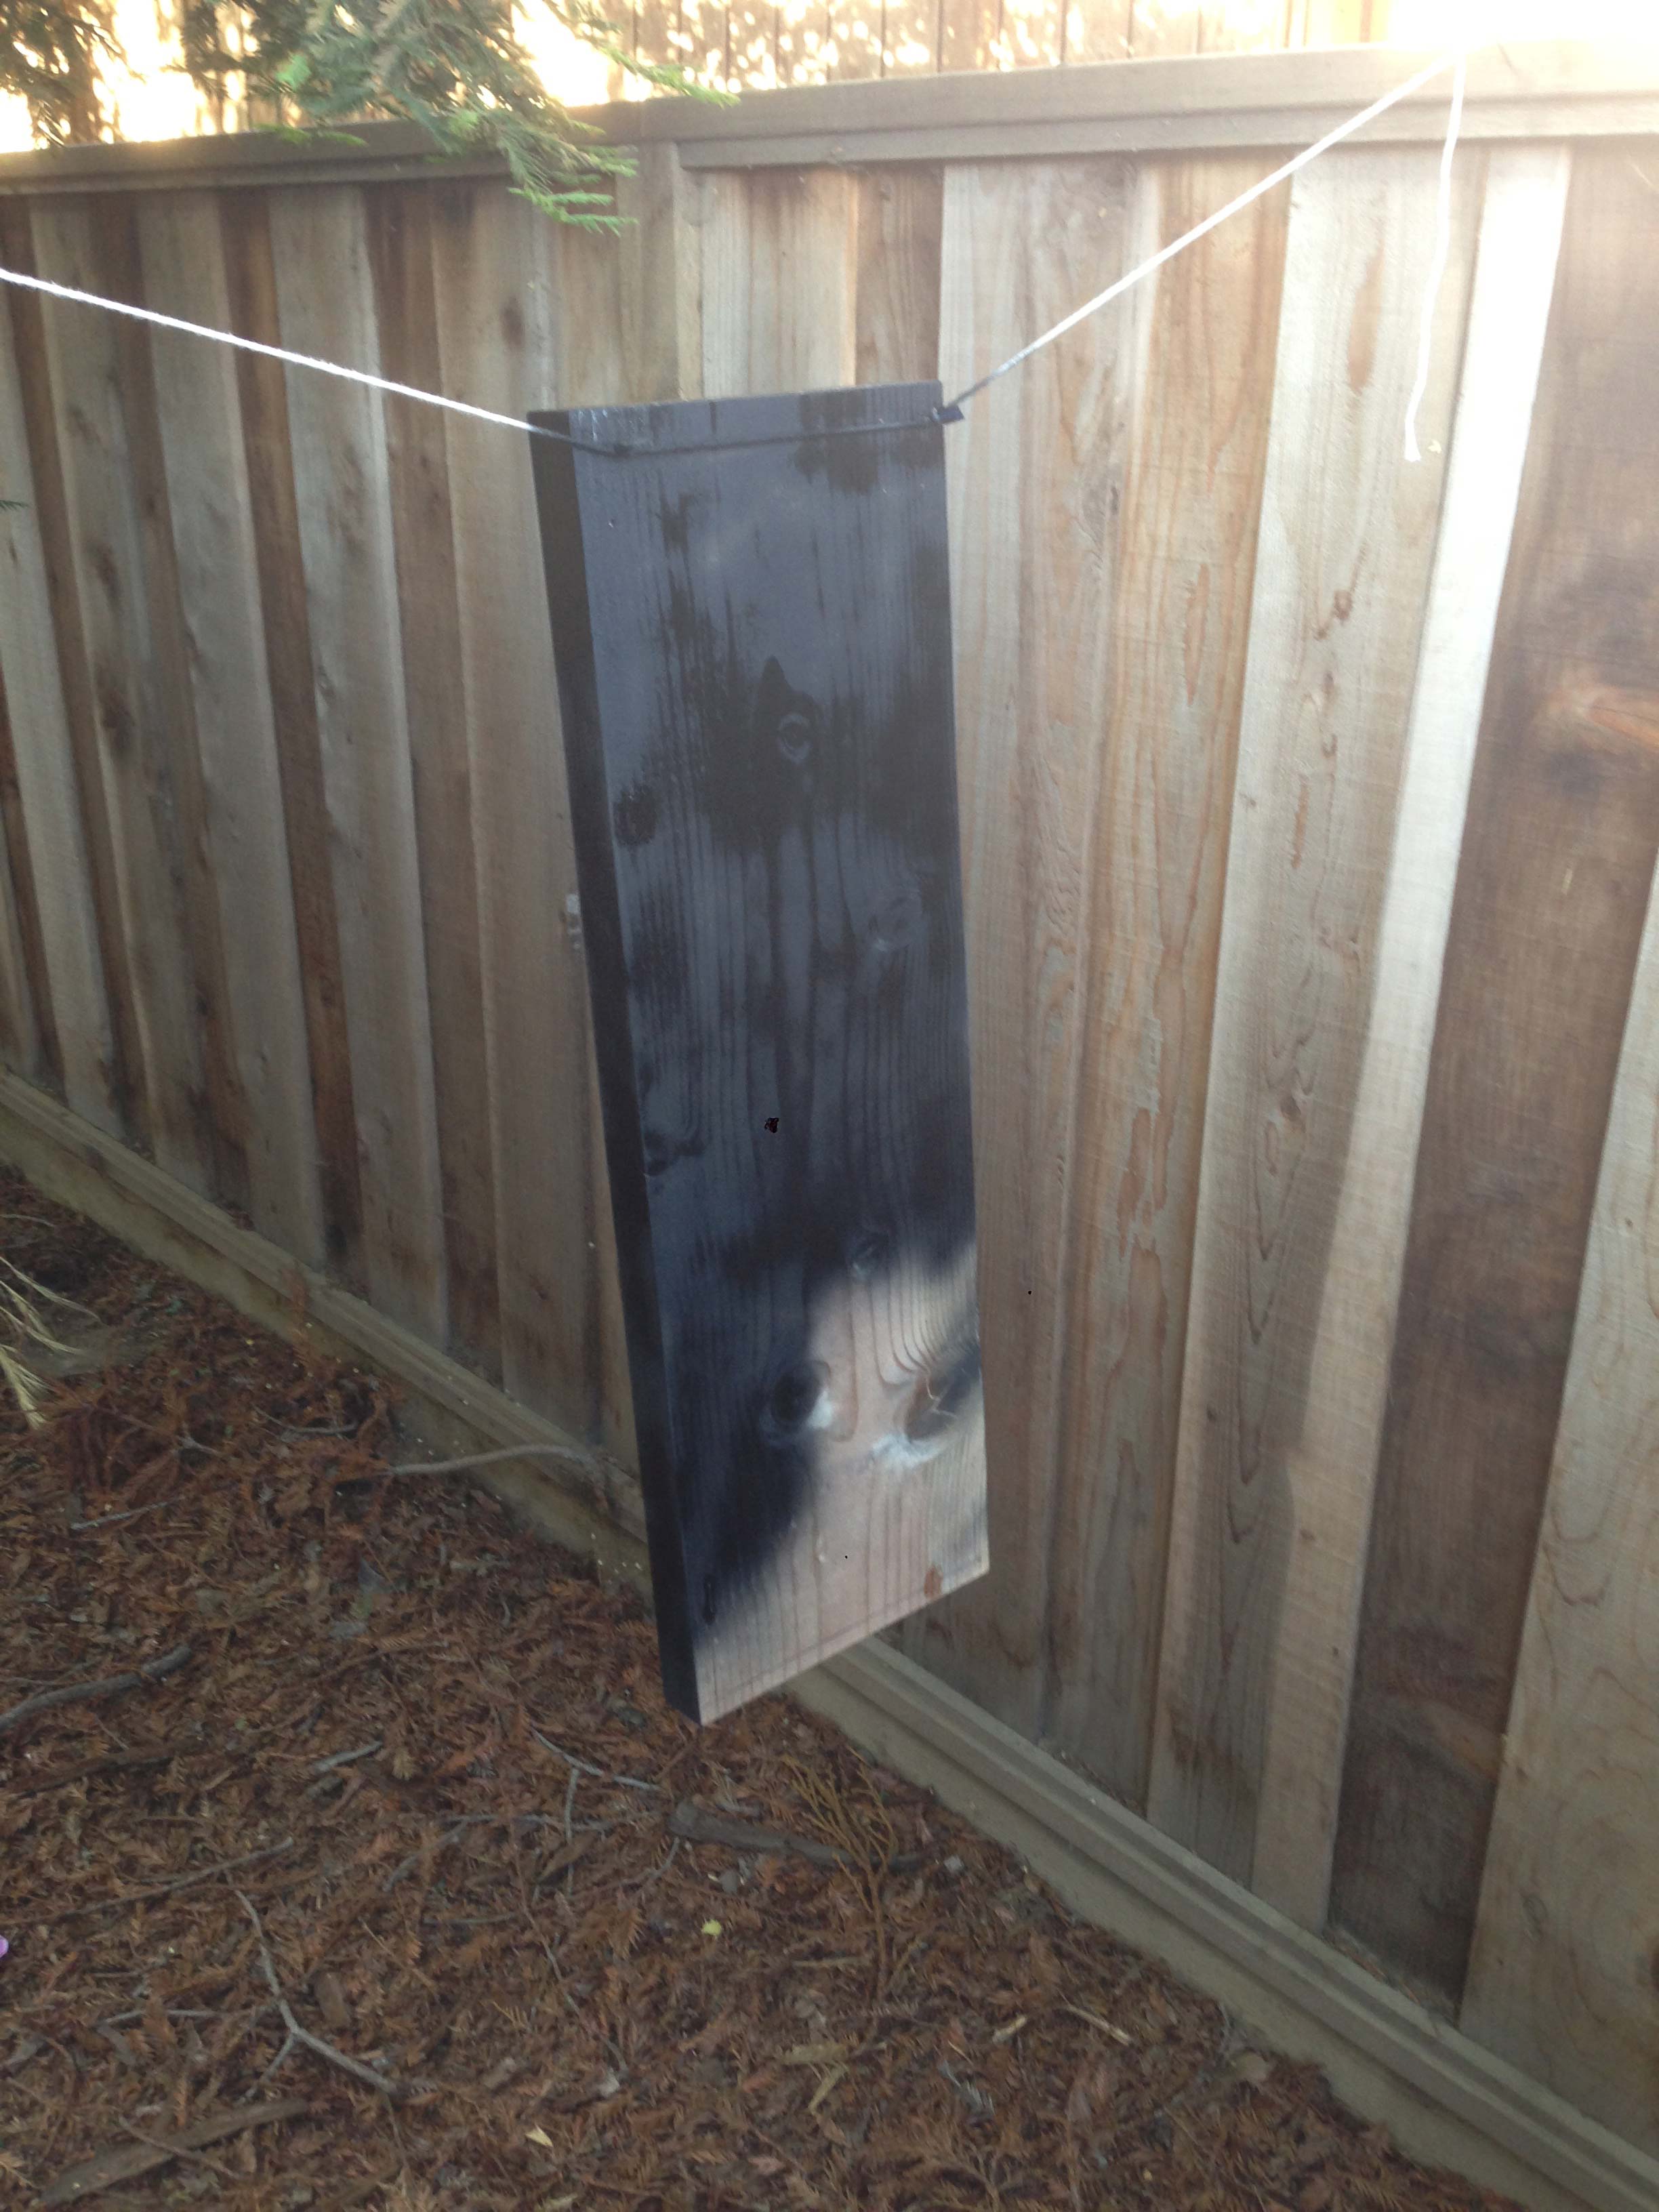
Spray the Flat Black paint onto the board on all sides, let it dry for 24hrs (depending on your environment temp). I put two coats on mine. On the top-sided board, screw in the ¾’ Flat Head Phillips wood screws in each pilot holes you created earlier. Remember, do not screw it all the way into the wood, you will want the head at least ¼” sticking out on all 4 screws. Then flip the board to bottom sided and attach the rollers and line up the 4 holes and screw them in like this: 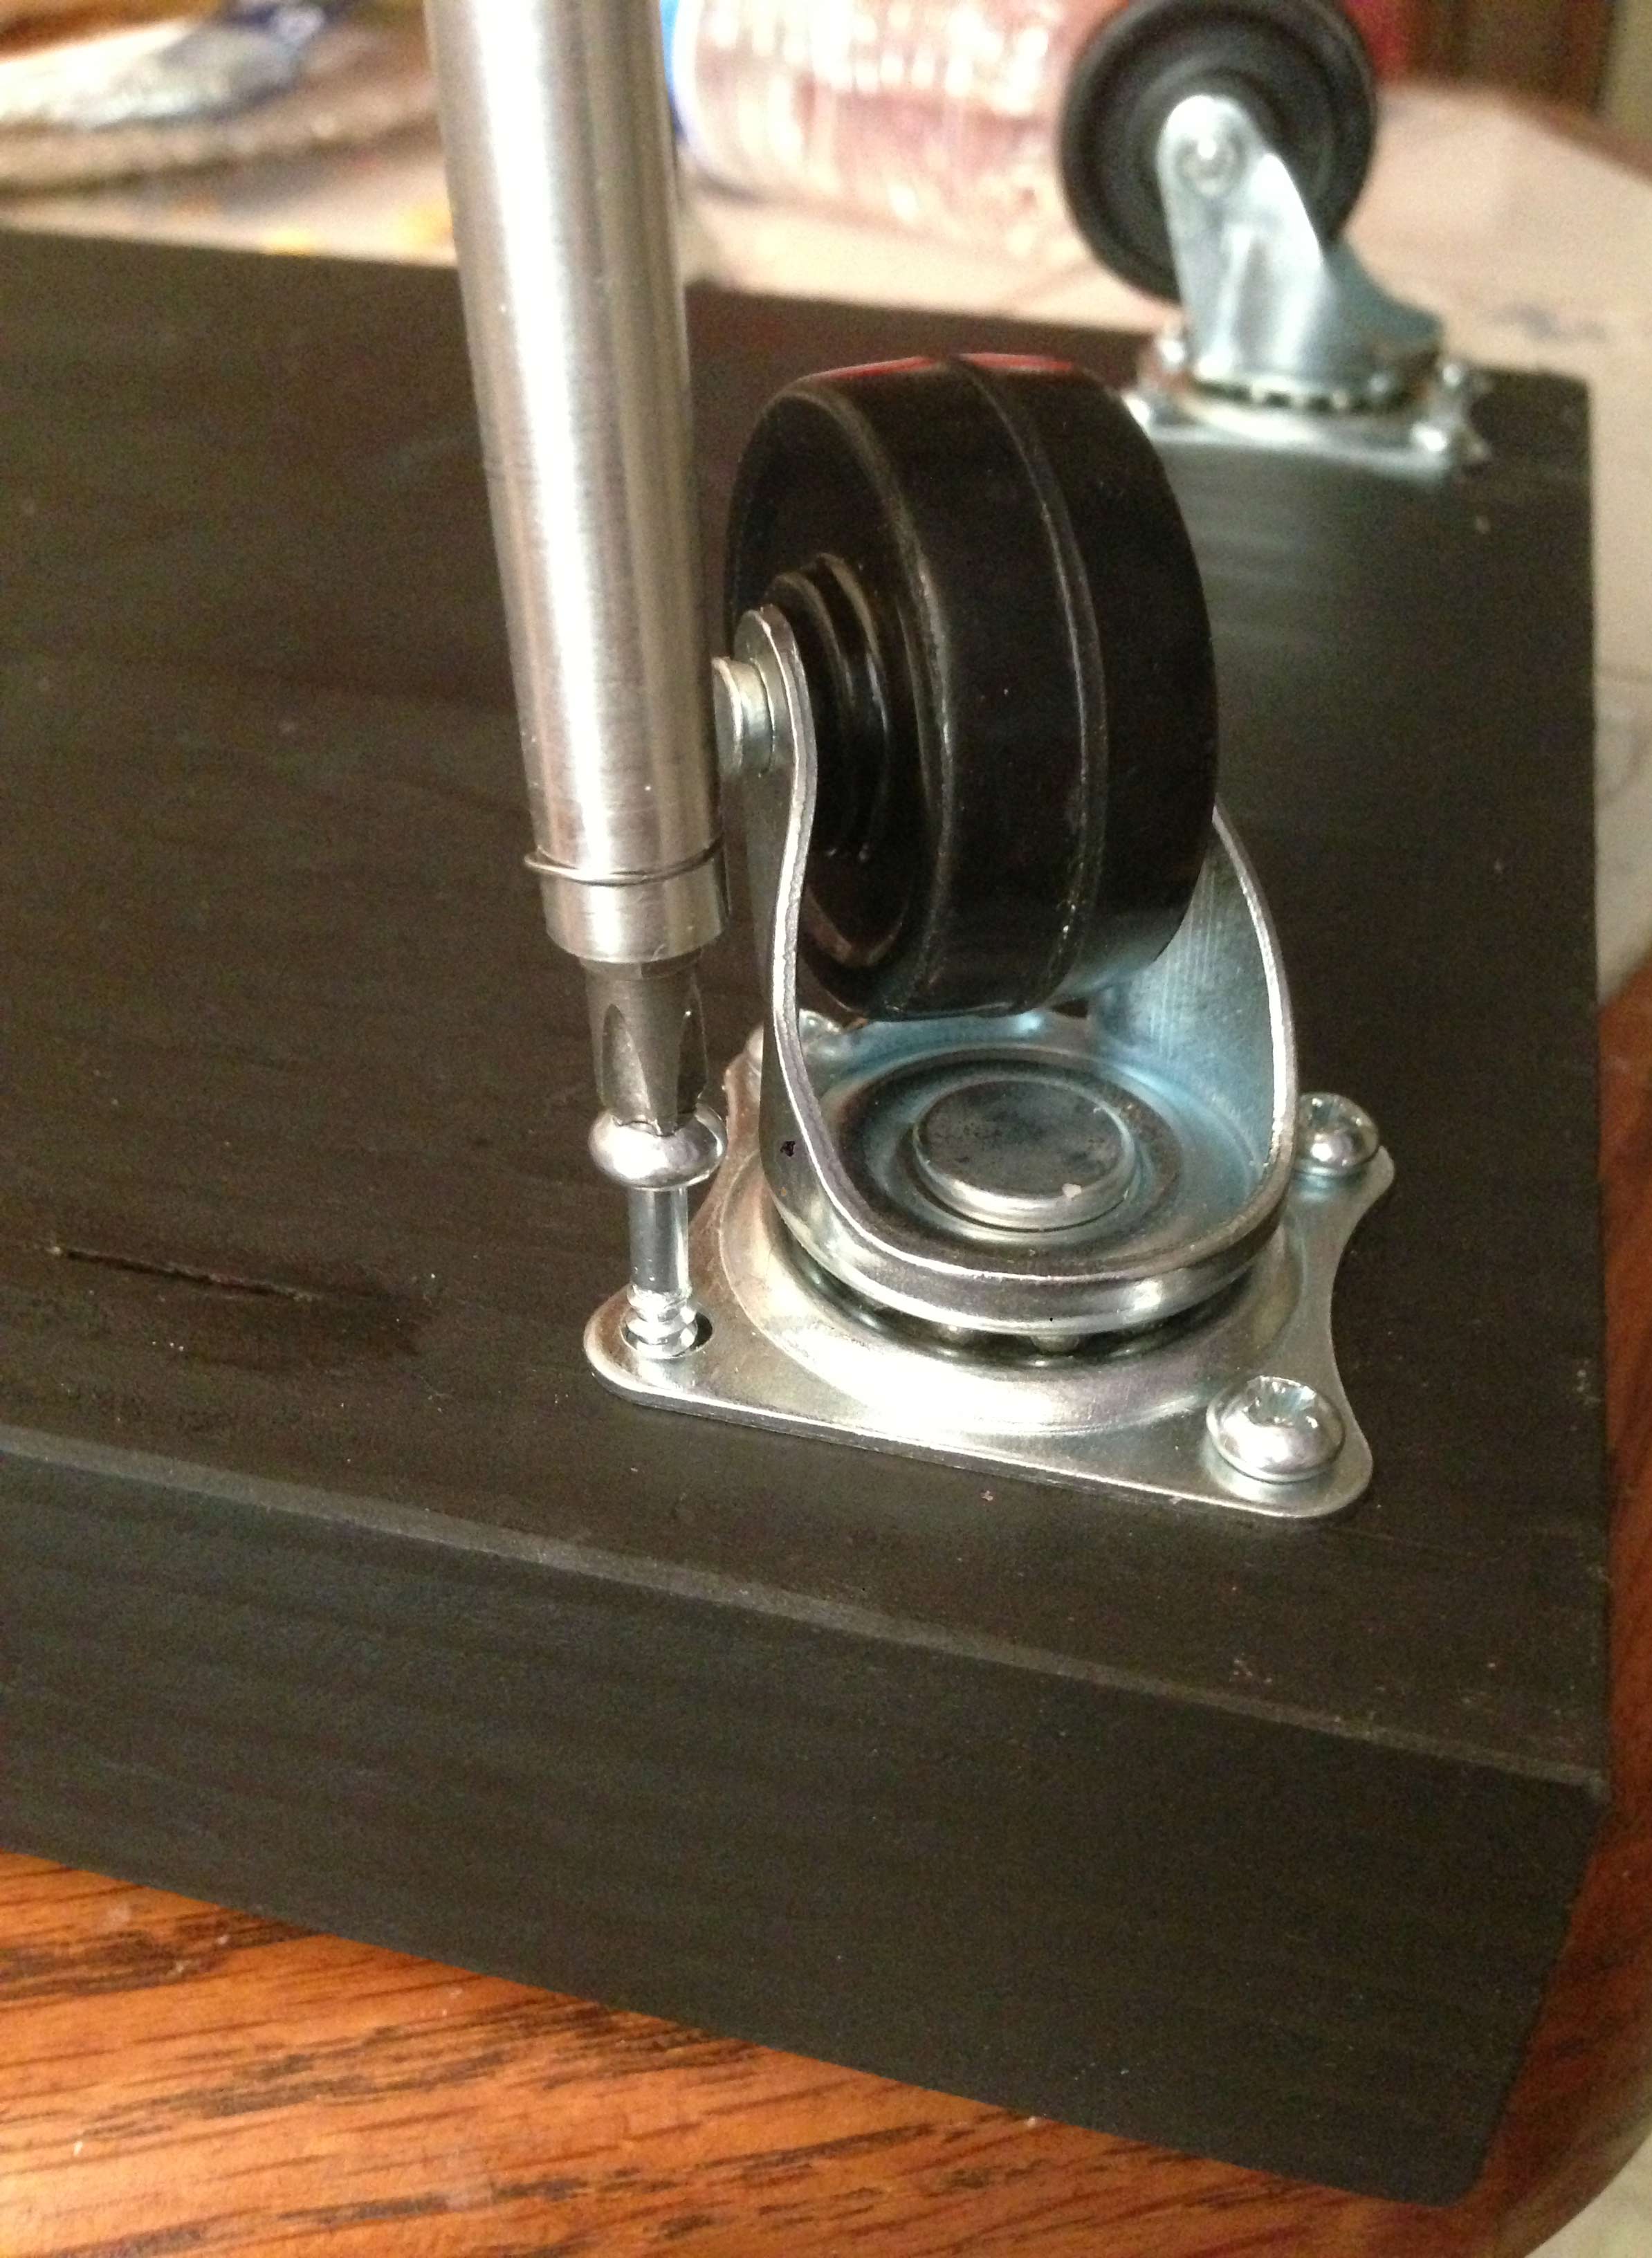
Ah! There it is, the finished product! Now, you may have to jiggle a bit so those 4 screws to "lock" in place when putting the Aventum case on top of it. Check each corner to confirm that there should not be any gap between the legs and the board...if it is then its not seated properly. Jiggle/move bit more until seated on all four corners. 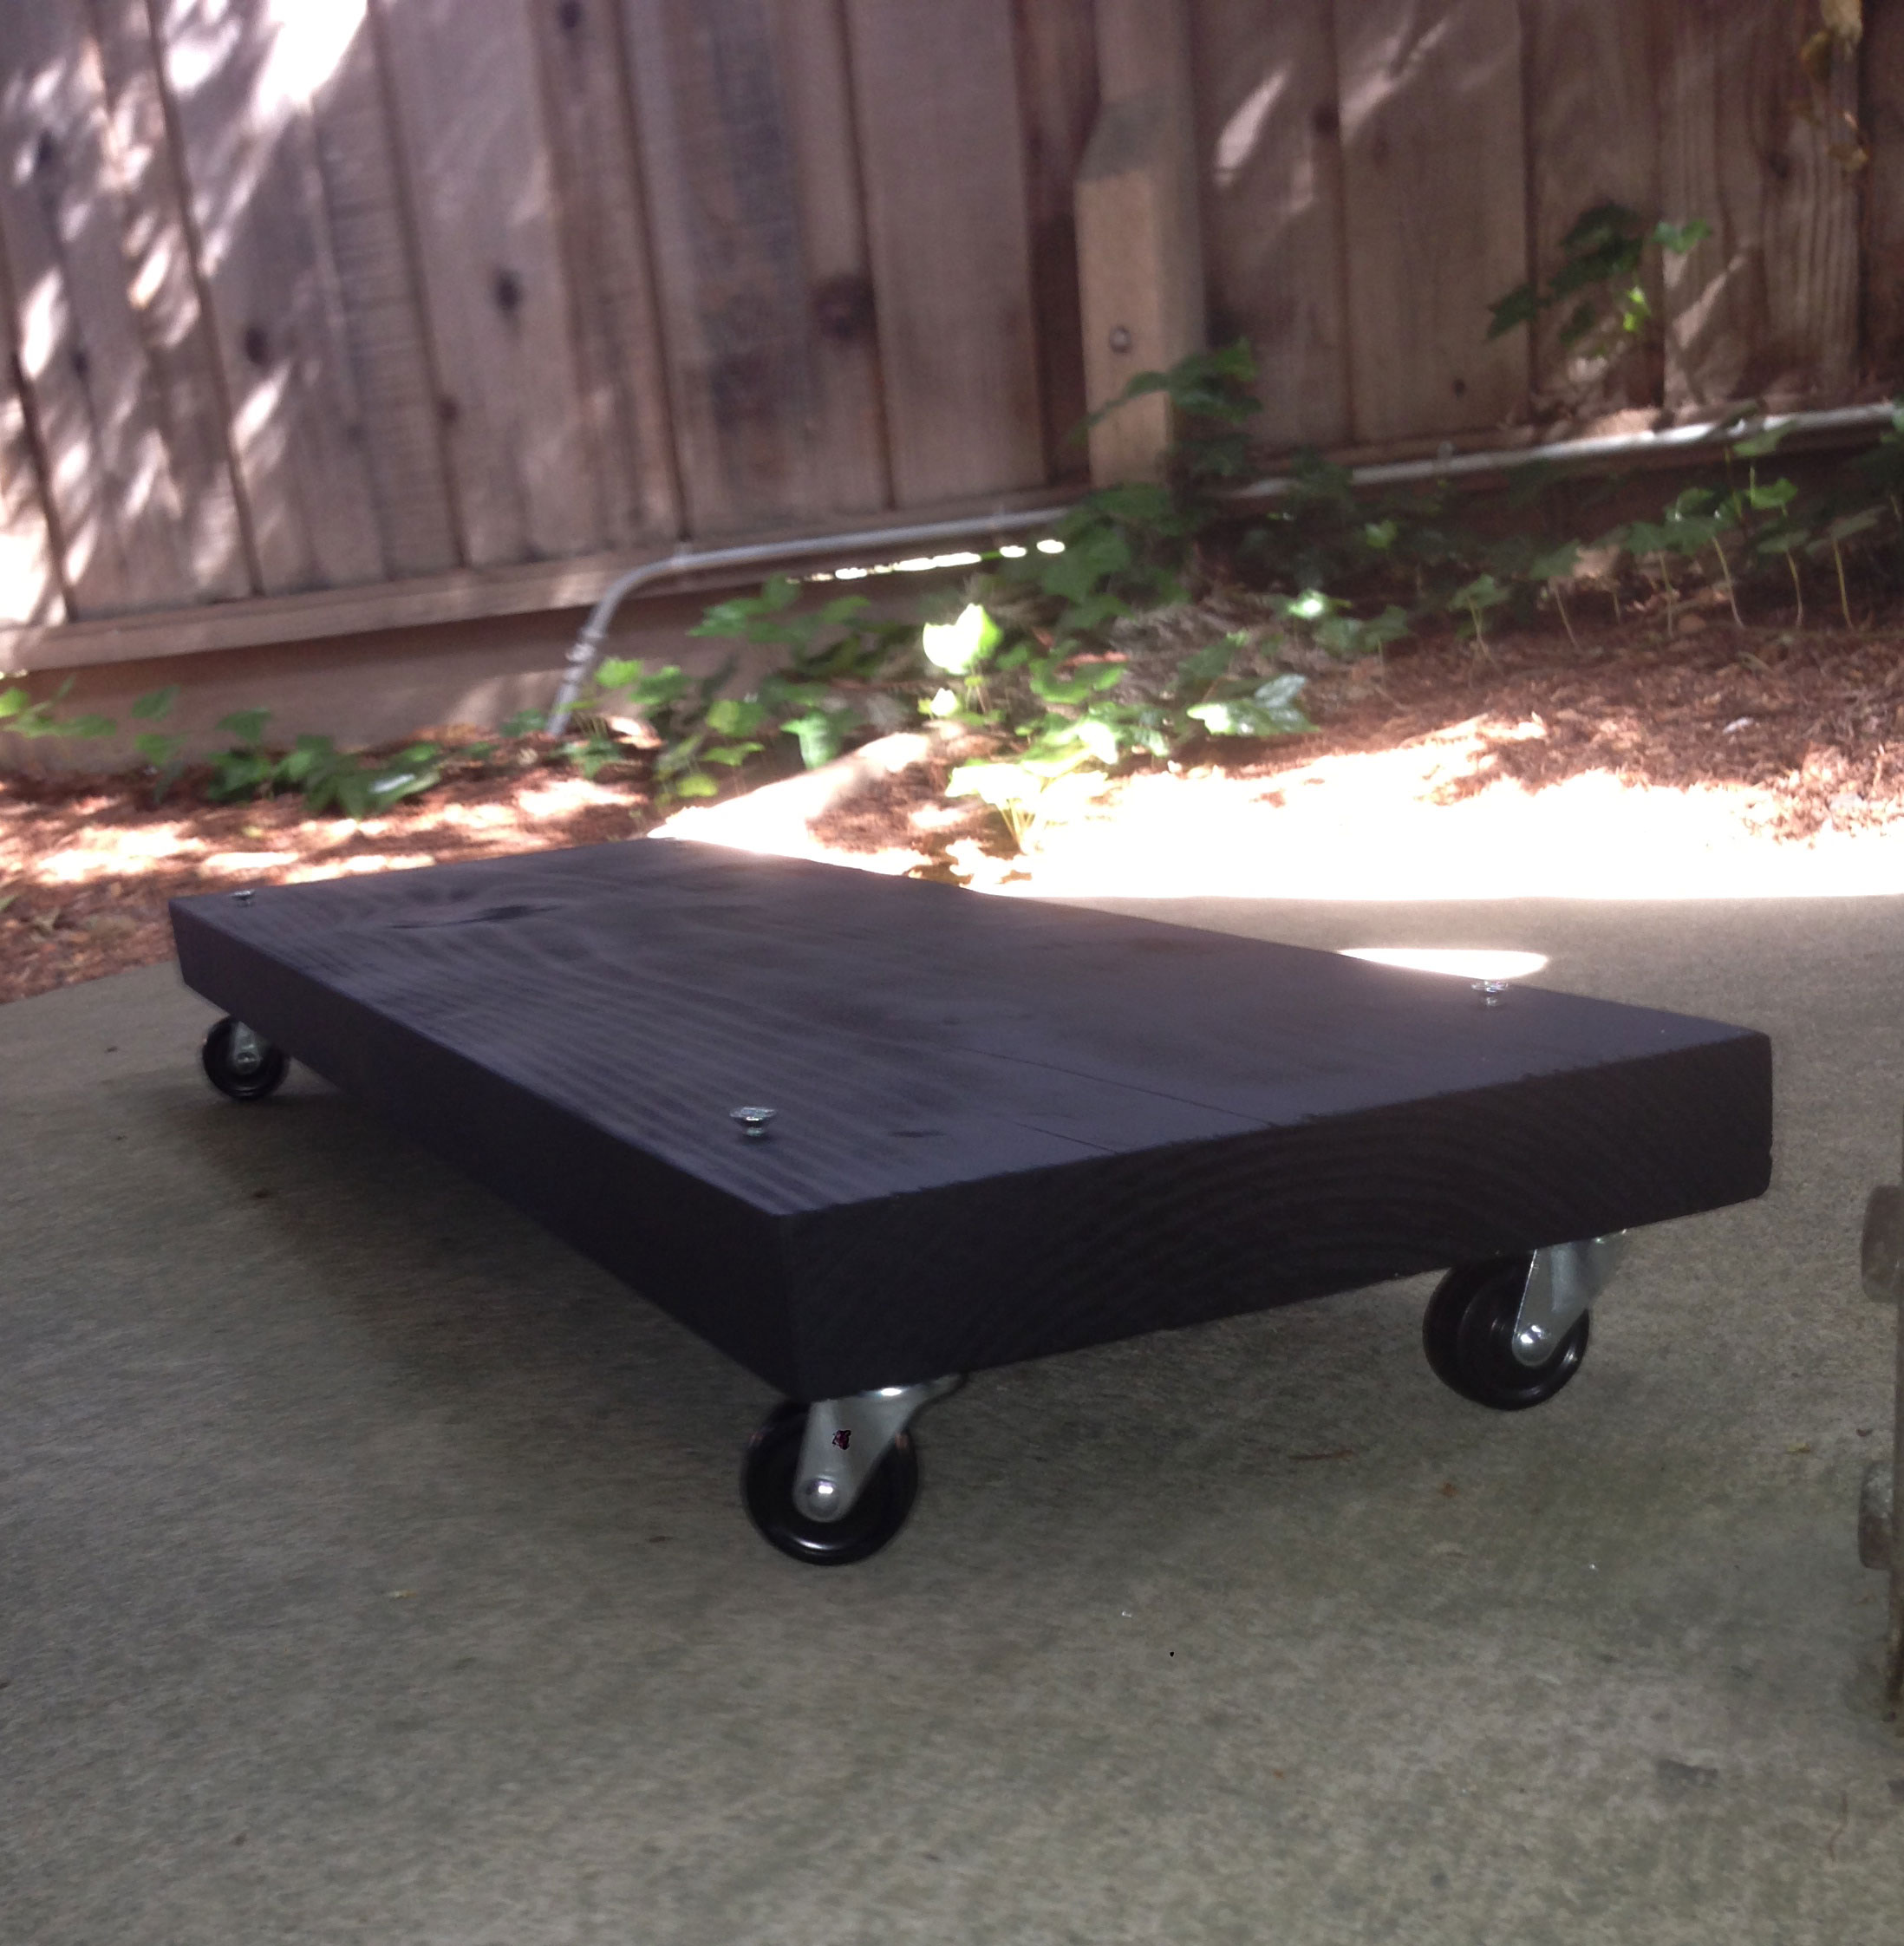
Note, after transporting...you may notice the case has slightly moved forward or back on the board where it doesn't exactly flushed with the sides of the Wood Rollers. This is okay due to the oval shaped outer hole on the Aventum's legs. Simply, re-align the case back up on the board. If you want, instead of putting 1 Flat head screw on each corner, just add two screw - side by side and I believe it will make a bit tighter fit (I haven't test it so you need to verify it) but you will have to jiggle it alot more to get it attached to the case or removing it. Here are the diagrams: 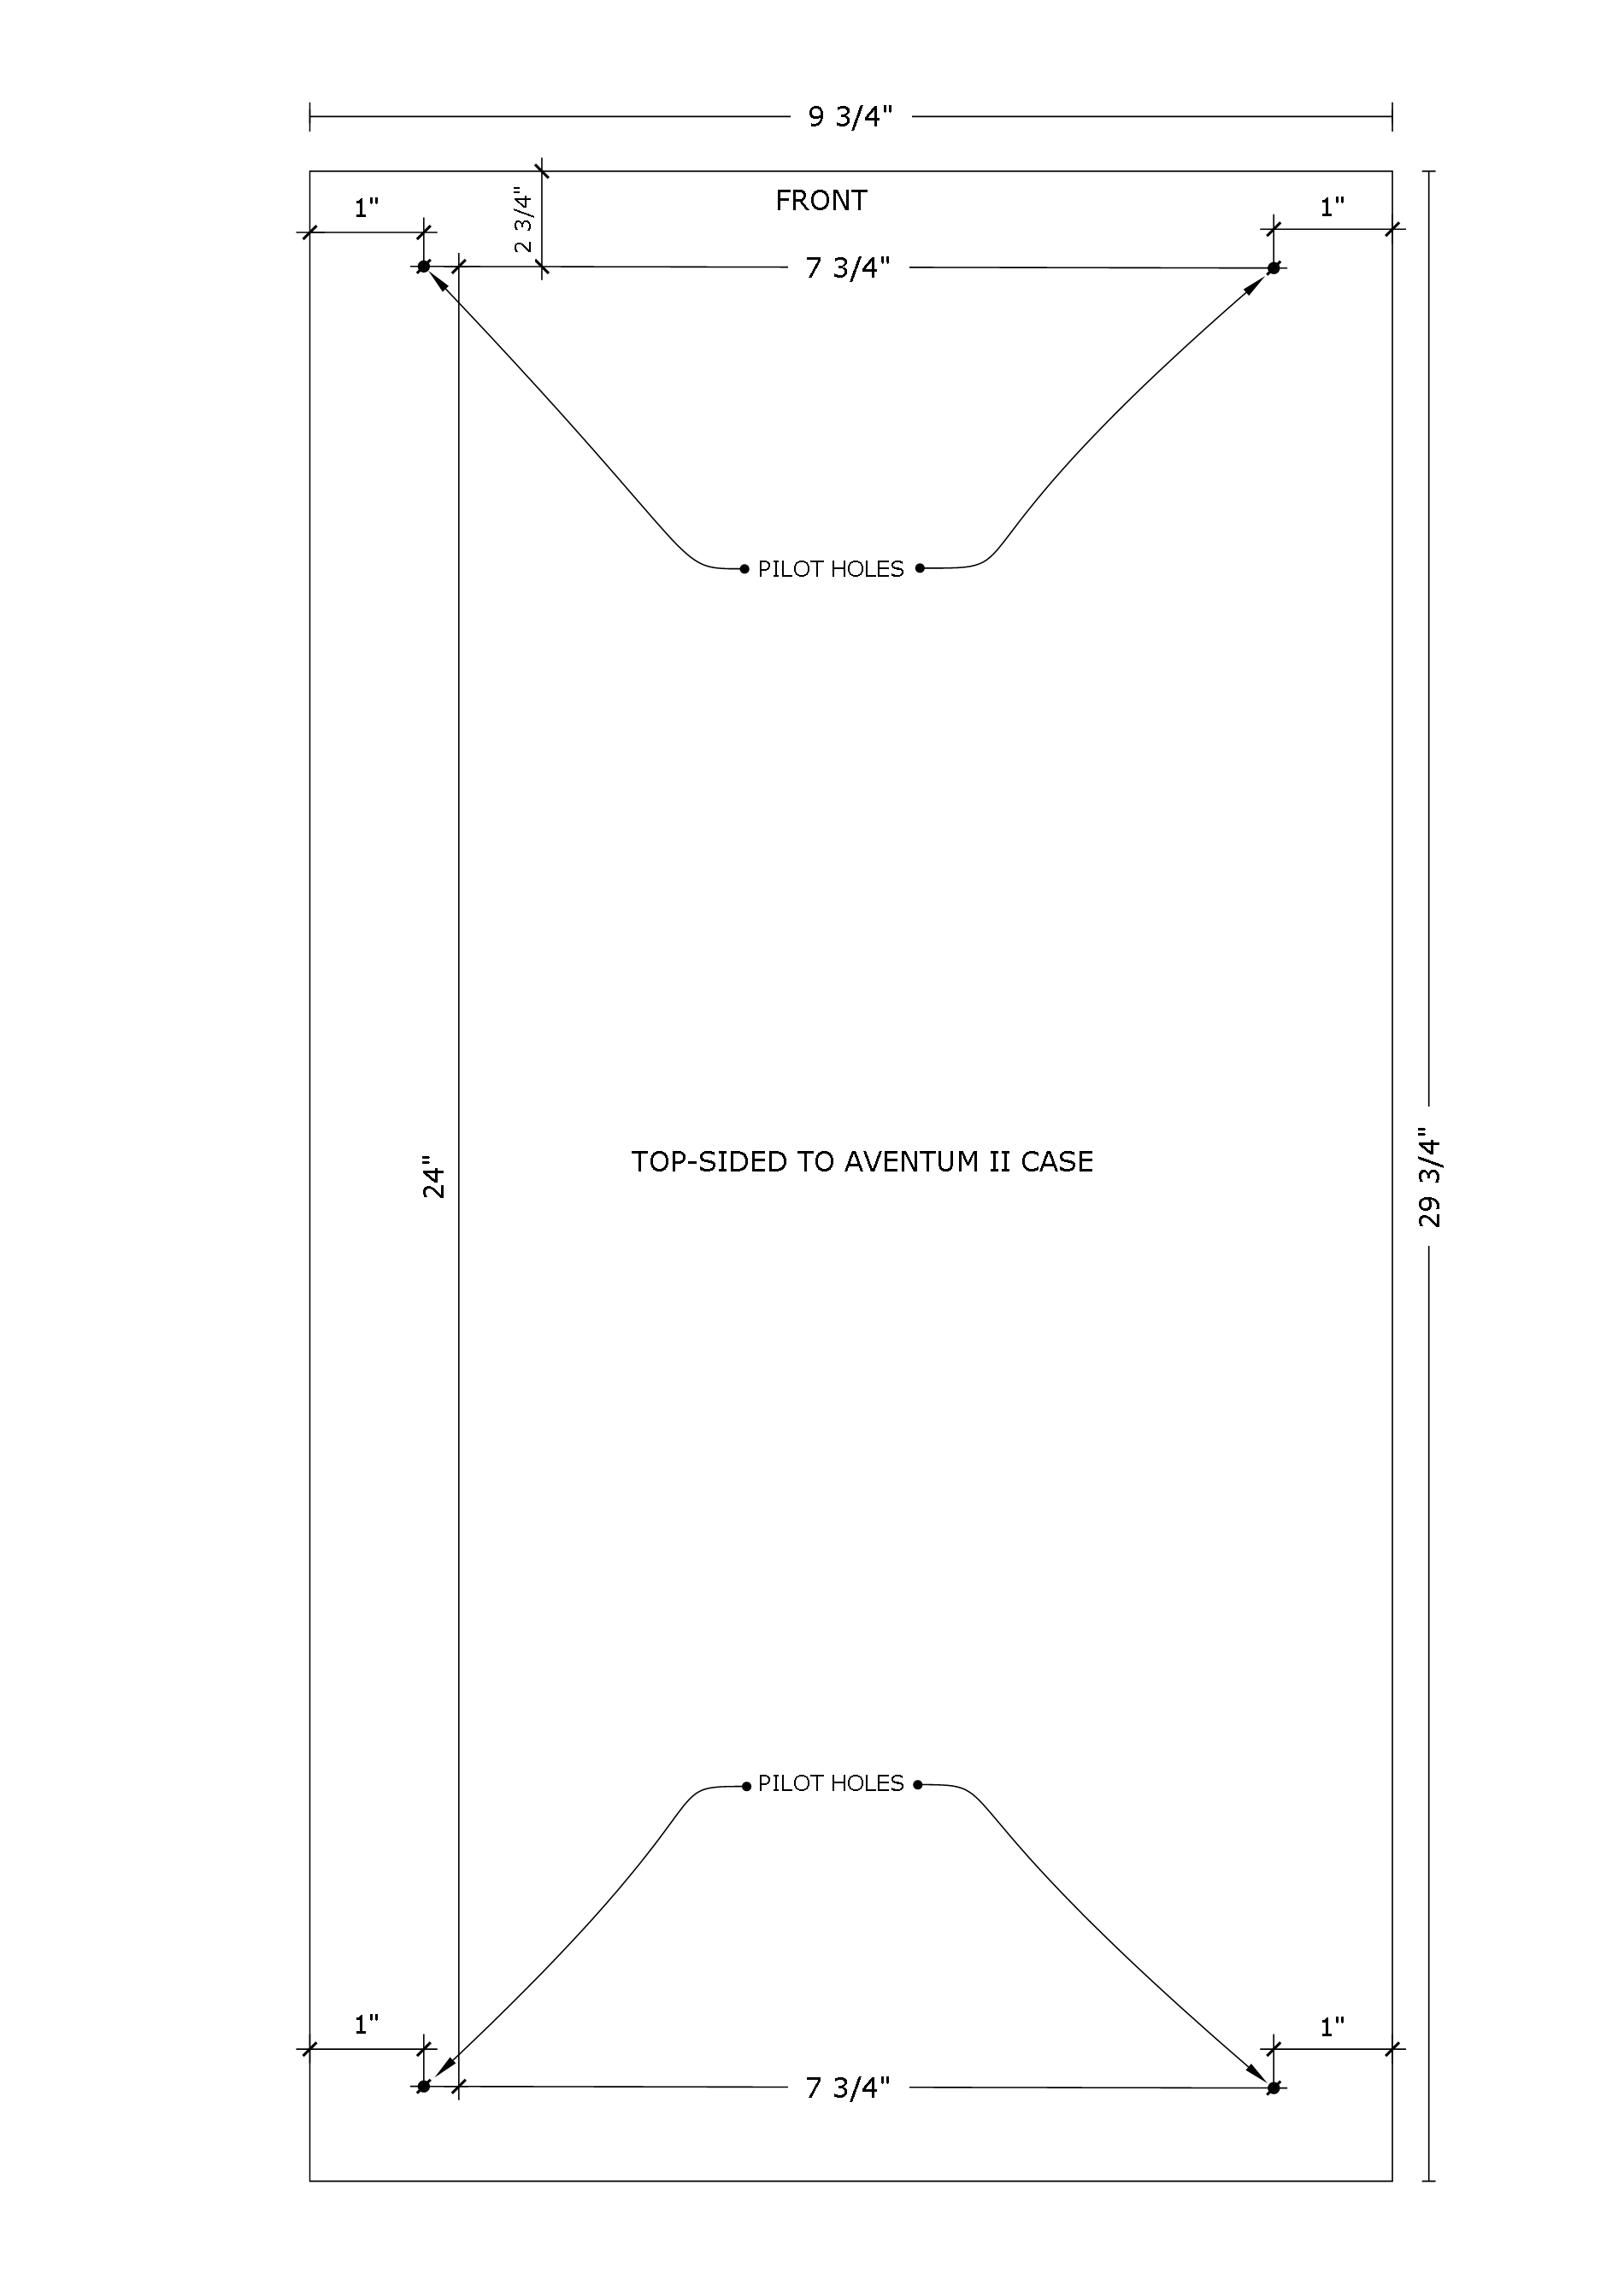 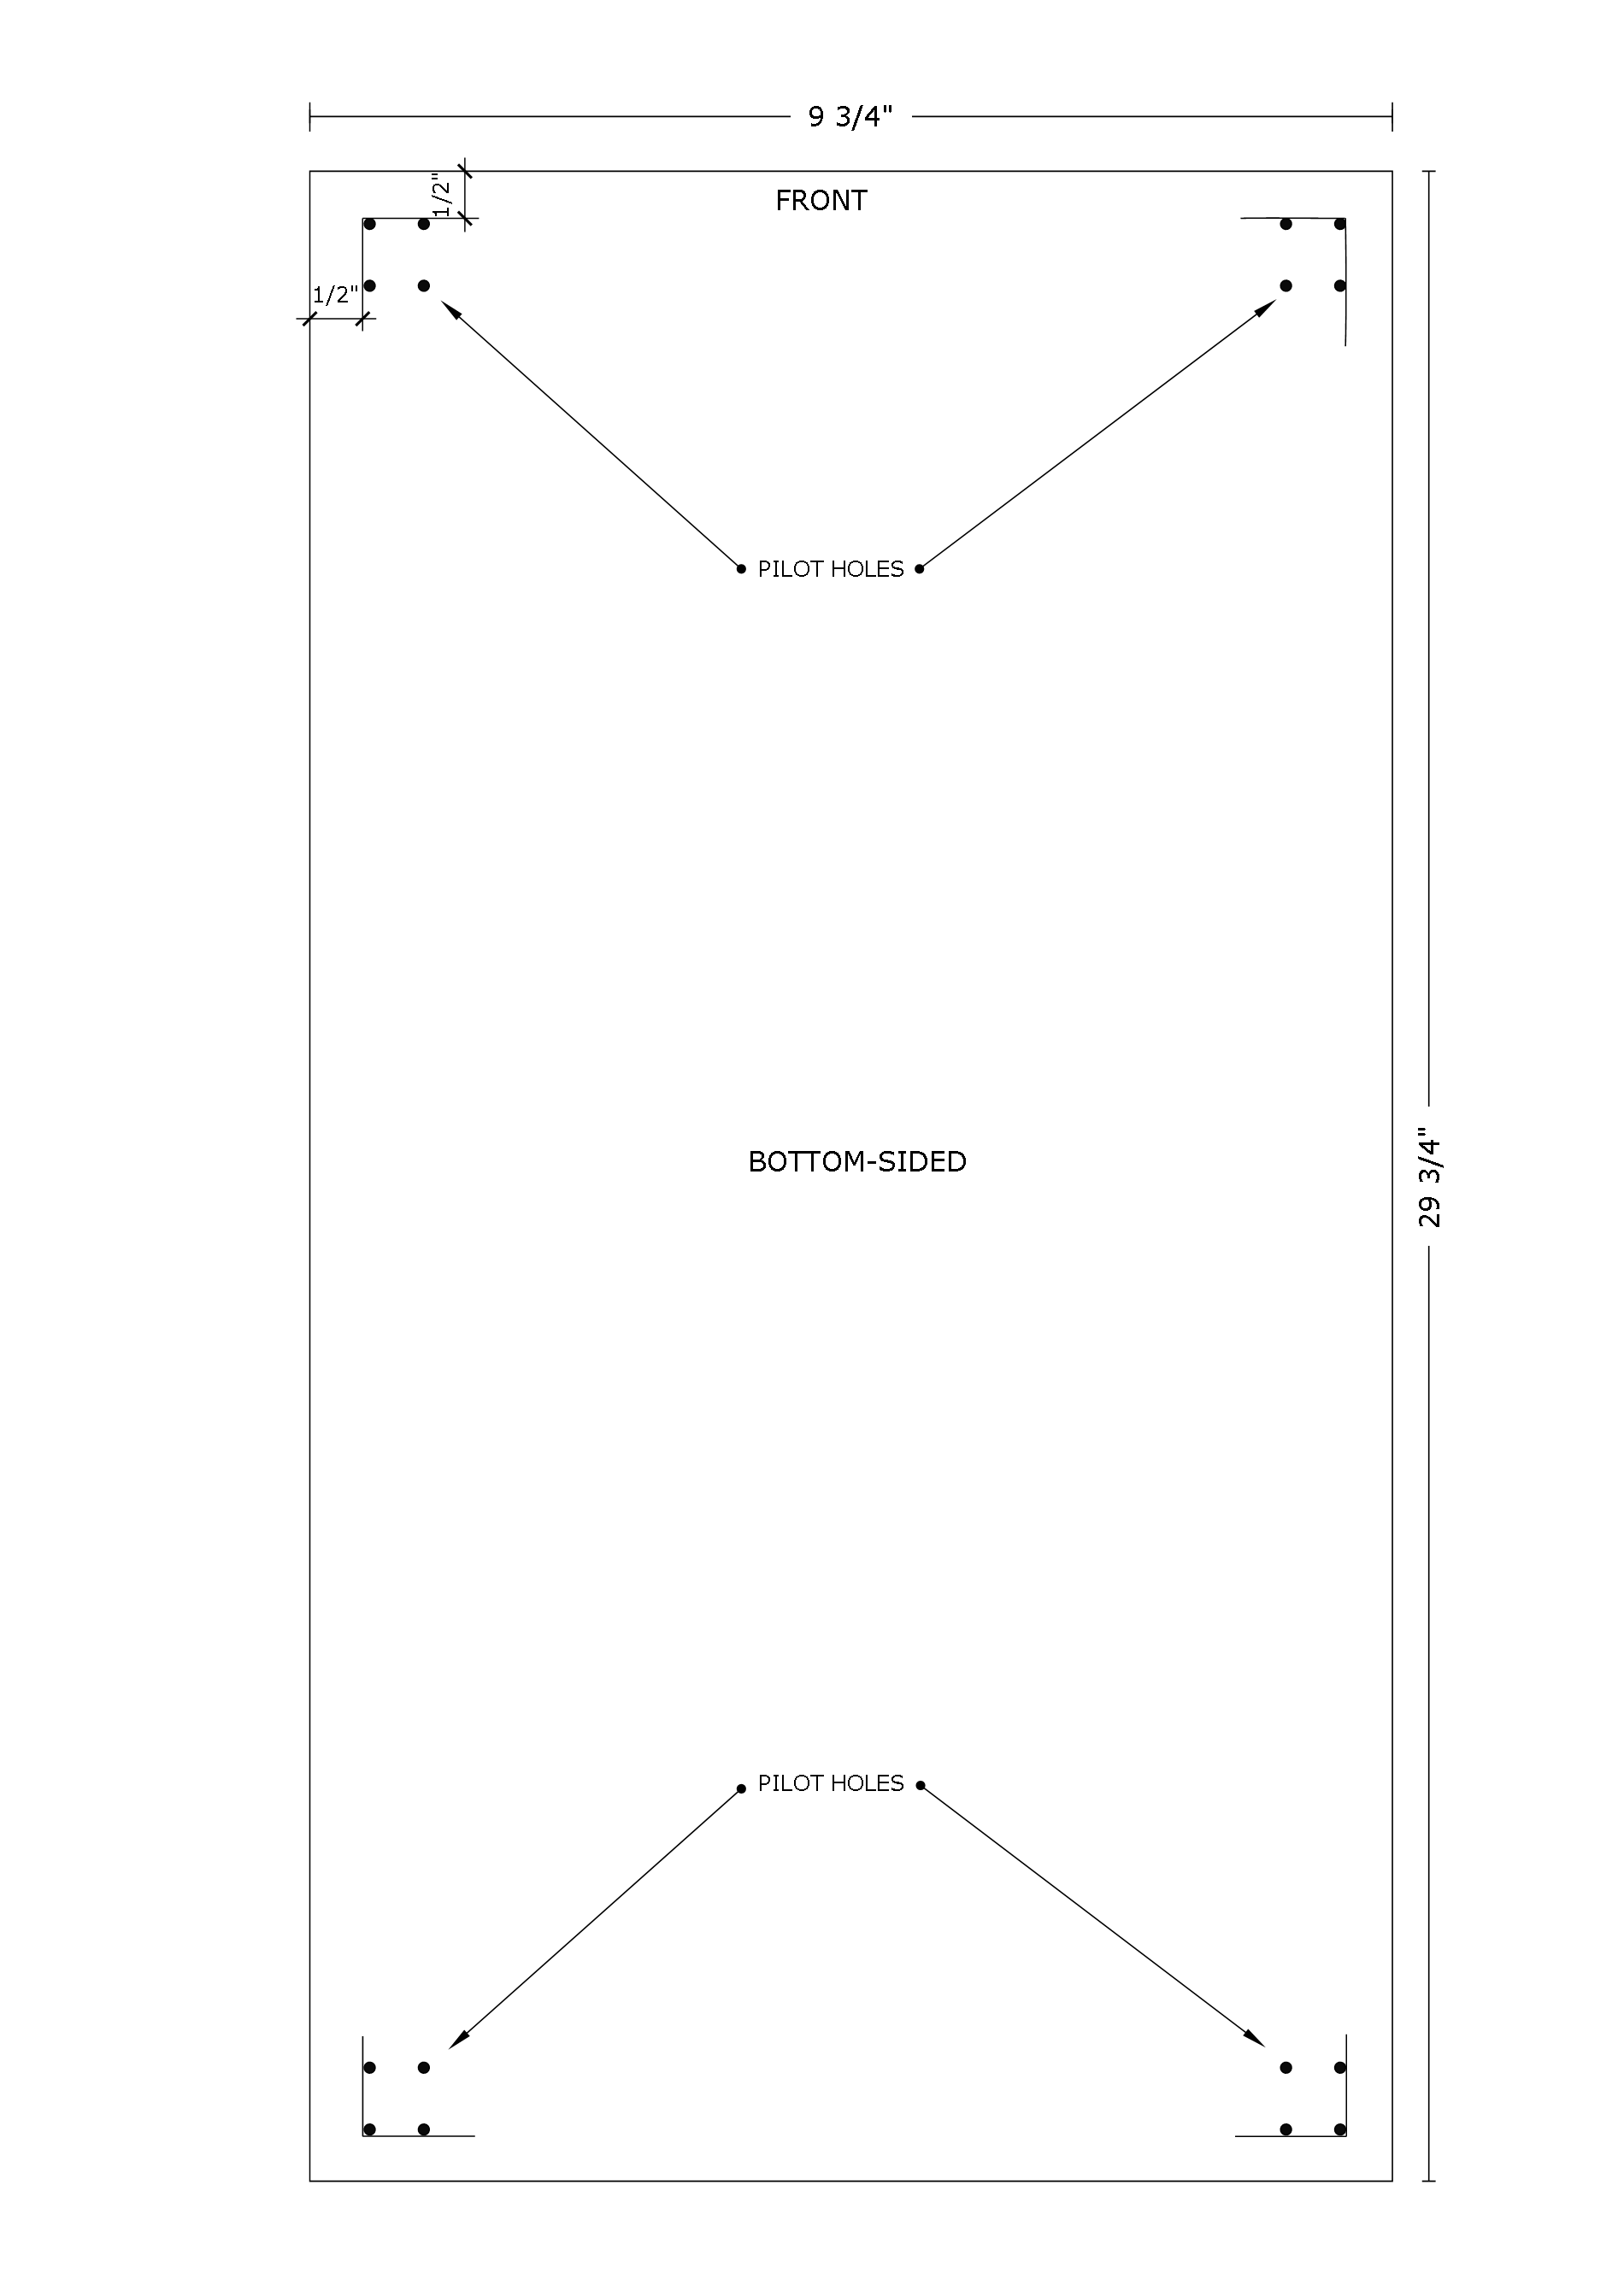
Good luck with the project and let me know how it turns out (or not) :) Edited by Blackstar - 31 May 2014 at 9:23pm |
|
 |
|
|
bprat22
DS ELITE 
DigitalStorm East -- (Unofficially!)
Joined: 08 Jun 2011 Online Status: Offline Posts: 20391 |
Quote Reply
Posted: 31 May 2014 at 3:13am |
|
Nice job and Thanks. Those with the Beast we call Aventum might find this very useful.

|
|
|
|
|
Snaike
Moderator Group 
Just a dude trying to keep the spam away
Joined: 23 Jan 2014 Online Status: Offline Posts: 9459 |
Quote Reply
Posted: 31 May 2014 at 3:27am |
|
Very nice instructions and illustrations. Thank you for putting this up.
|
|
|
|
|
Post Reply
|
| Forum Jump | Forum Permissions You cannot post new topics in this forum You cannot reply to topics in this forum You cannot delete your posts in this forum You cannot edit your posts in this forum You cannot create polls in this forum You cannot vote in polls in this forum |
About Digital Storm
Contact Information
Facility Tour
Financing
Buy Now, Pay Later
Downloads
GSA Schedule
Terms & Conditions
Privacy Policy
Request Help
Call: 1-866-817-8676
(Hours 9AM-5PM PST)
![]()
![]()
![]()
![]()
![]()


 Topic Options